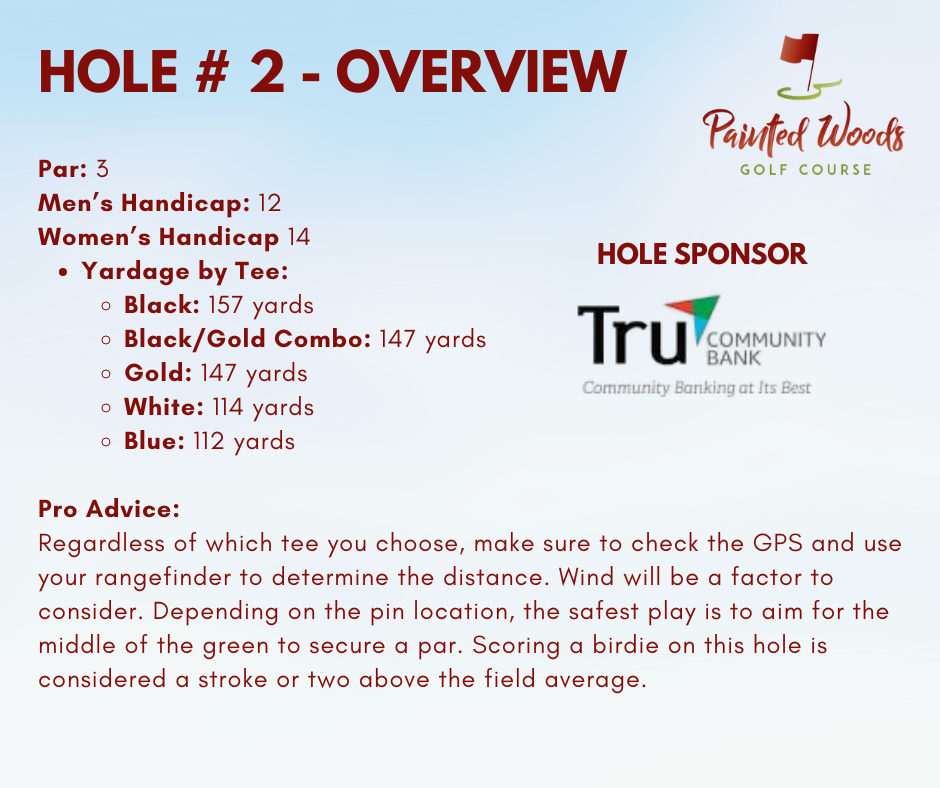
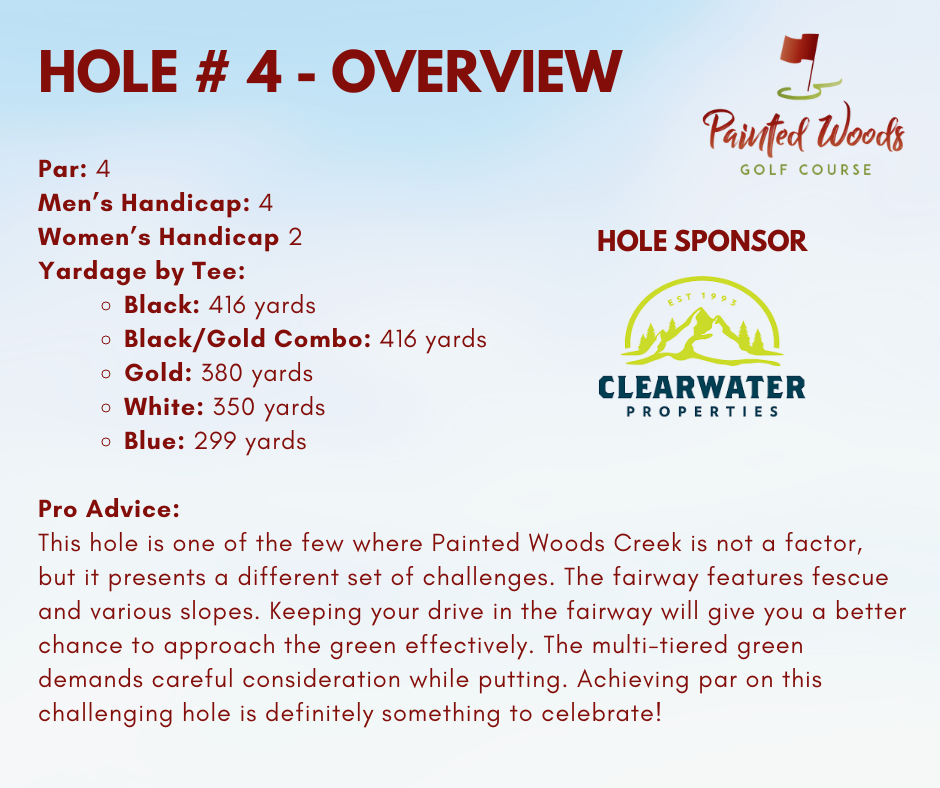
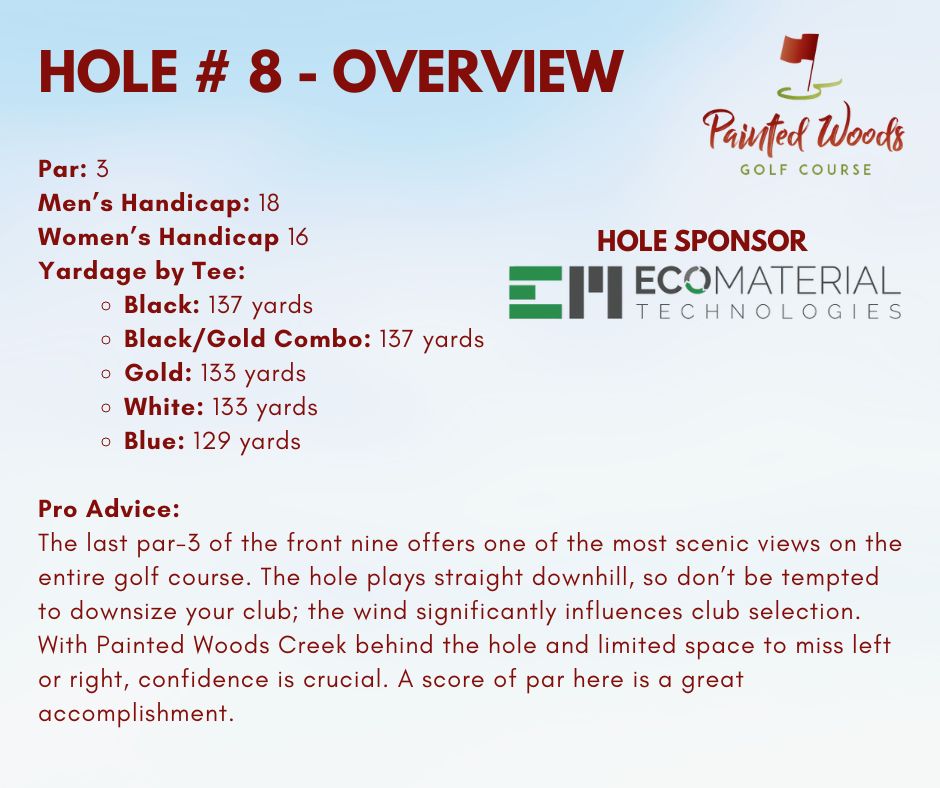
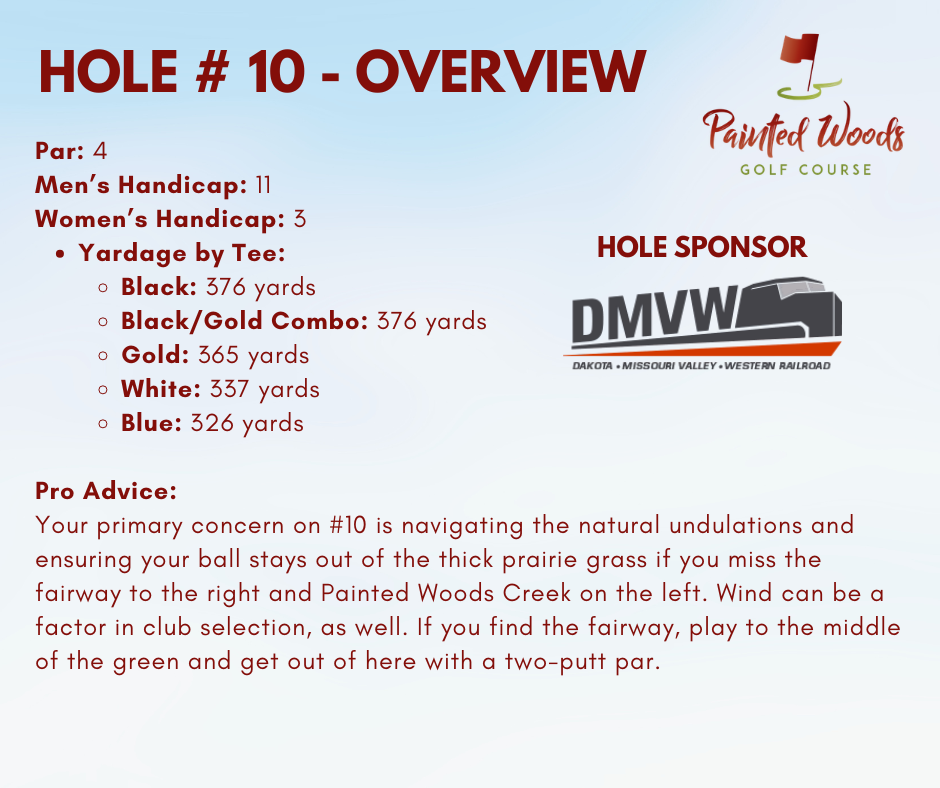
Hole-by-Hole Guide

Click the below to get a description of each hole, along with advice from PGA Head Golf Professional, Michael Herzog. We want to thank our Hole Sponsors for their support of our golf course and community. Thank you for choosing Painted Woods Golf Course as your destination course, and make sure to join us in The Woods Bar & Grill after your round to celebrate those achievements!  

Quick Tip: The professional strategy focuses on navigating the elevated tee shot and the course’s signature multi-tiered greens.

Quick Tip: Par is a solid score, but achieving a birdie is a stroke or two above the average for the field.

Quick Tip: Aim for the waste bunker in the distance. If your drive lands in the fairway below the hill, go for it in two. 

Quick Tip: Keeping your drive in the fairway will give you a better chance to approach the green effectively.

Quick Tip: A well-placed drive down the fairway is essential if you want to reach the green in two shots.

Quick Tip: If you can make par on this hole, you’ll get a boost of confidence heading into Hole #7, a driveable par-4.

Quick Tip: This straightforward, drivable par-4 presents a great opportunity to gain a stroke back.

Quick Tip: The hole plays straight downhill, so don’t be tempted to downsize your club; the wind significantly influences club selection.

Quick Tip: Your approach shot is blind, so you’ll need to rely on the pine trees behind the green to help gauge the hole’s location.

Quick Tip: This begins the back nine with a test of precision and elevation management.

Quick Tip: Confidence is important, especially with Painted Woods Creek running along the right side.

Quick Tip: The safest strategy is to lay up to about 140-160 yards from the green. Par is a great score. 

Quick Tip: The wind will definitely be a factor due to the narrow but wide shape of the green. Par is a great score for this hole.

Quick Tip: You will need to choose between laying up or trying to go for it, which could lead to a high score if not executed well.

Quick Tip: Depending on the tee you choose, there is a risk-reward scenario when attempting to drive the green.

Quick Tip: A challenging par-3 hole that demands precision from the tee box.

Quick Tip: Downhill par-5 features a slight dogleg to the right and provides a generous landing area for your tee shot.

Quick Tip: The green is protected by four large pine trees and slopes from back to front.